Audio-Technica provides readily accessible online manuals for all their products, simplifying ownership and ensuring a smooth user experience with your turntable.
Availability of Online Manuals
Fortunately, obtaining a manual for your Audio-Technica record player is incredibly straightforward in today’s digital age. You don’t need to worry about lost paperwork or searching through physical archives. Audio-Technica has made all of their manuals conveniently available online, directly on their official website – Audio-Technica.com.
This accessibility ensures that support is always at your fingertips. Simply navigate to the product page corresponding to your specific model. Within that page, you’ll find a dedicated “Download” section where you can either download the manual as a PDF file for offline viewing or view it directly within your web browser. This ease of access promotes a hassle-free ownership experience.
Locating Your Specific Model’s Manual
To find the correct manual for your Audio-Technica turntable, begin by visiting the official Audio-Technica website (Audio-Technica.com). From there, navigate to the “Support” or “Products” section – the exact labeling may vary slightly. Once in the product area, use the search bar to enter your specific model number, such as “AT-LP120XBT-USB”.
Selecting your model will lead you to its dedicated product page. Look for a “Downloads” or “Manuals” tab. Clicking this will reveal a list of available resources, including the user manual. You can then choose to download the PDF or view it online. Ensuring you have the correct model number is crucial for accessing the accurate documentation.
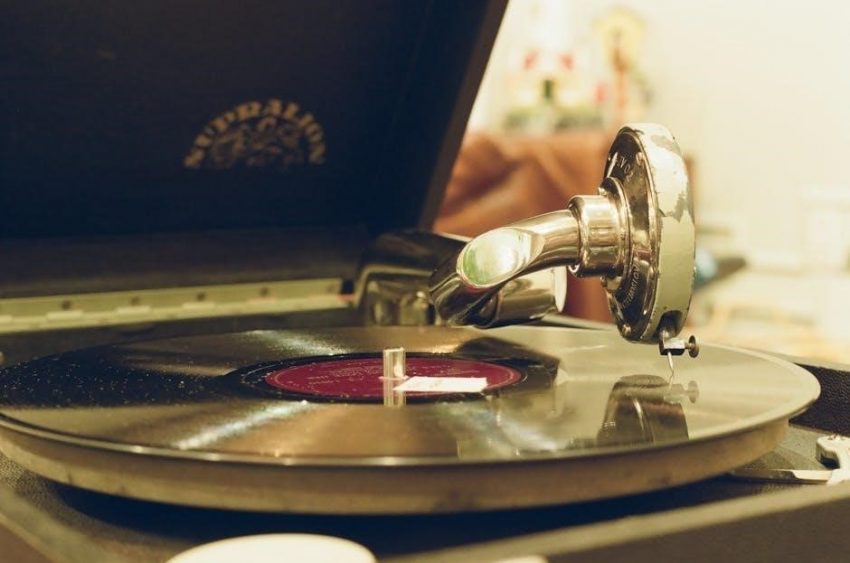
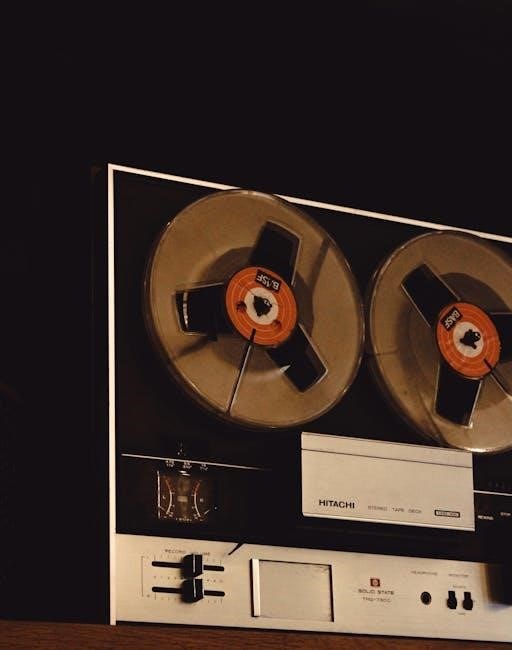
Understanding Your Audio-Technica Turntable
Familiarize yourself with key components like the platter, tone arm, and speed selector to optimize performance and enjoy your vinyl collection fully.
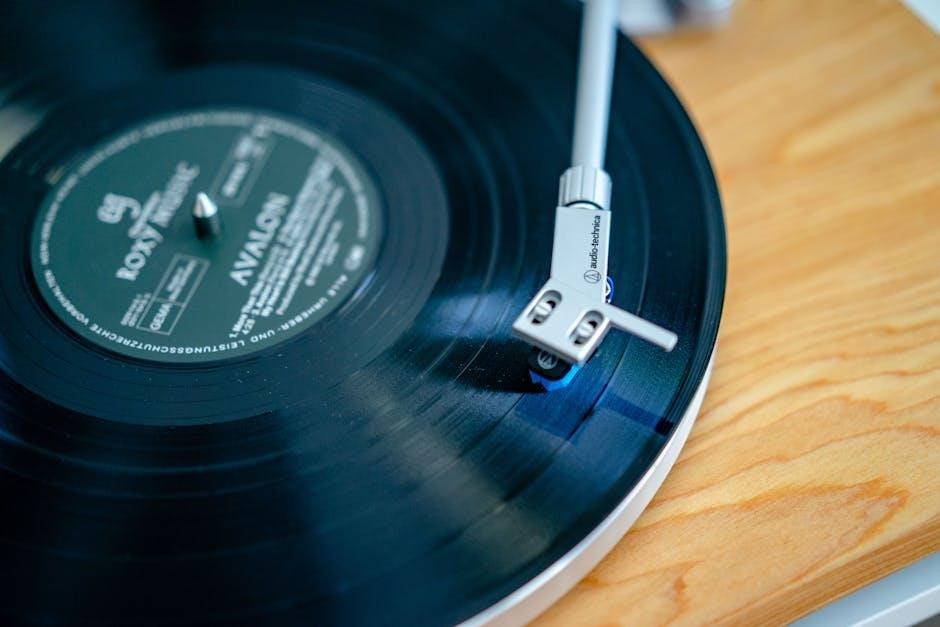
Key Components and Their Functions
The platter is the rotating surface where your vinyl record rests during playback, ensuring consistent speed for accurate audio reproduction. The tone arm holds the cartridge and stylus, delicately tracing the record’s grooves to convert vibrations into sound. The stylus (needle), a crucial component, requires periodic replacement to maintain sound quality and prevent record damage.
Speed selection allows you to choose between 33 ⅓ RPM for LPs and 45 RPM for singles. The power dial controls the turntable’s operation, while the start/stop button initiates and halts playback. Understanding these components is vital for proper setup and operation, maximizing your listening enjoyment and preserving your valuable vinyl collection.
Powering On and Off
To power on your Audio-Technica turntable, locate the power dial, typically situated on the front or side of the unit. Rotate the dial clockwise to the “ON” position. You should observe an indicator light illuminating, confirming power activation. Ensure the turntable is connected to a grounded power outlet for stable operation.
When finished listening, turn the power dial counterclockwise back to the “OFF” position. This completely disconnects the turntable from the power source. Always power off the unit when not in use to conserve energy and prolong its lifespan. Avoid abruptly disconnecting the power cord while the turntable is operating, as this could potentially cause damage.
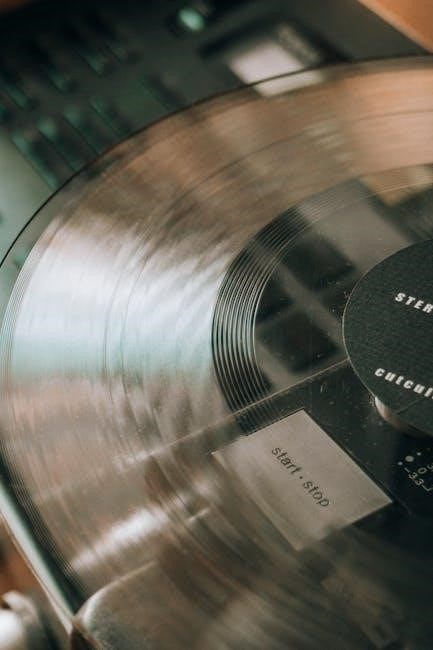
Platter Operation and Speed Selection
Initiating platter rotation is simple: after powering on, press the “Start” button. The platter will begin to spin, reaching the selected speed. Audio-Technica turntables commonly offer 33 ⅓, 45, and sometimes 78 RPM speeds, catering to various record types.
Speed selection is usually controlled by a switch or buttons near the start/stop button. Ensure the correct speed is chosen to match your record. Incorrect speed will result in distorted or inaccurate playback. To halt the platter, press the “Stop” button. Carefully lifting the tone arm with the cueing lever before stopping prevents damage to the stylus and record.
Setting Up Your Audio-Technica Record Player
Proper setup involves connecting to speakers or a computer, and crucially, grounding the turntable to minimize hum and ensure optimal audio fidelity.
Connecting to Speakers
Connecting your Audio-Technica record player to speakers requires understanding your speaker system’s inputs. Many turntables, particularly newer models, lack built-in amplifiers. Therefore, powered speakers (those with their own amplification) are often the simplest solution. Connect the RCA outputs from your turntable to the corresponding inputs on the powered speakers.
If you’re using passive speakers (requiring an external amplifier), you’ll need a phono preamplifier. The turntable connects to the preamp via RCA cables, and the preamp then connects to the amplifier, which drives the passive speakers. Ensure correct grounding to avoid unwanted noise. Always verify the volume levels are initially set low before powering on to protect your speakers and ears.
Connecting to a Computer via USB
Connecting your Audio-Technica turntable to a computer via USB allows for direct digital recording of your vinyl collection. Simply connect the included USB cable from the turntable’s USB port to a free USB port on your computer. Your computer should recognize the turntable as an audio input device.
You’ll likely need audio recording software, such as Audacity (often recommended), to capture the audio. Within the software, select the Audio-Technica turntable as the recording source. Adjust recording levels to prevent clipping. The USB connection provides a convenient way to digitize your records, preserving them in a digital format for long-term enjoyment and portability.
Grounding the Turntable
Proper grounding is crucial to minimize hum and noise during playback. Your Audio-Technica turntable includes a grounding wire. Connect one end of this wire to the grounding terminal on the turntable, typically located near the RCA outputs. Connect the other end to the grounding screw on your amplifier or receiver.
If your amplifier lacks a grounding screw, you may need to connect it to a cold water pipe (ensure it’s metal and properly grounded). A weak or absent ground connection can result in audible hum. Ensuring a secure ground connection significantly improves the audio quality and listening experience, reducing unwanted interference.
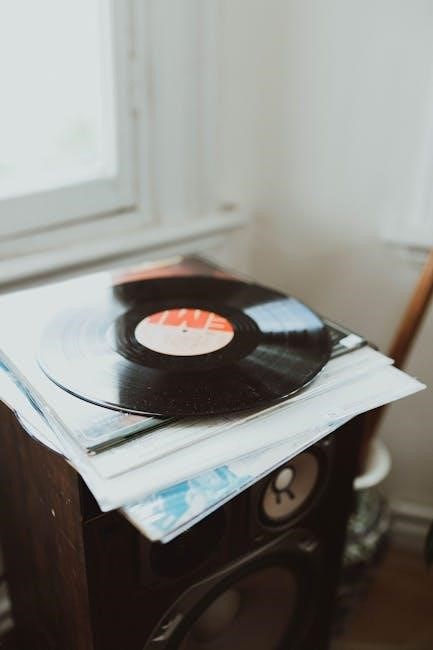
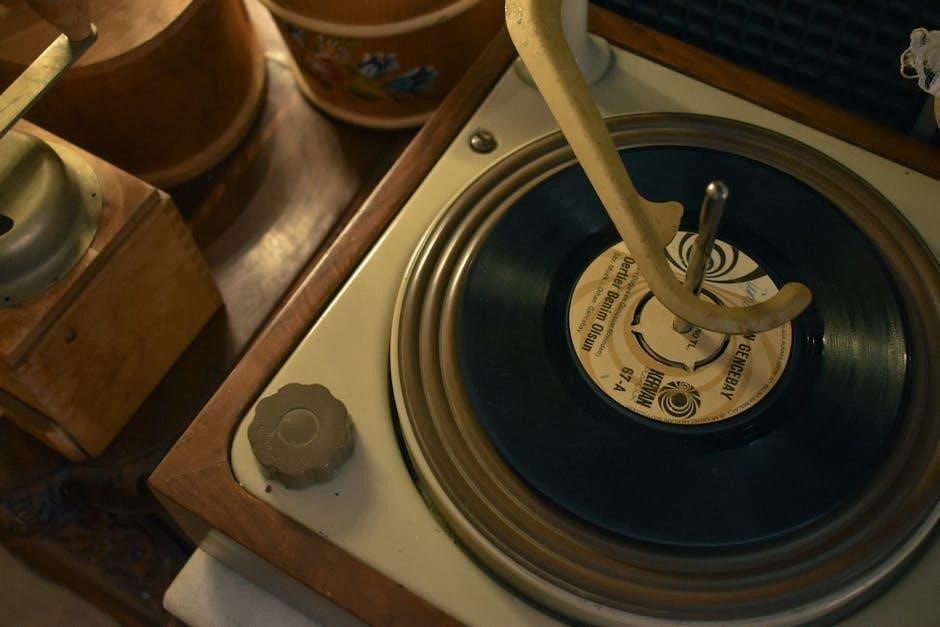
Playing Records
Begin playback by cueing the tone arm and carefully lowering it onto the record’s surface, initiating the platter’s rotation and sound reproduction.
Cueing the Tone Arm
Proper cueing protects both your records and the stylus. Before lowering the tone arm, ensure the turntable is powered on and the platter is rotating at the correct speed. Utilize the cueing lever – gently raise and lower the arm to the desired point on the record.
Avoid dropping the tone arm, as this can cause significant damage to the vinyl and potentially wear down the stylus prematurely. The cueing lever provides controlled descent, minimizing impact. Once positioned, the stylus will begin tracking the grooves, delivering the audio; To pause playback, raise the tone arm using the cueing lever, returning it to its resting position.
Adjusting Tracking Force and Anti-Skate
Tracking force, measured in grams, dictates how firmly the stylus presses into the record groove. Consult your record and cartridge specifications for the recommended range. Adjust using the counterweight at the rear of the tone arm; rotating it clockwise increases force, counterclockwise decreases it.
Anti-skate compensates for the inward pull experienced by the tone arm as it tracks the record. Set the anti-skate dial to match the tracking force. Proper adjustment minimizes distortion and ensures even wear on both groove walls and the stylus. Incorrect settings can lead to skipping or reduced audio quality, so precise calibration is crucial for optimal performance.
Automatic vs. Manual Operation
Audio-Technica turntables offer both automatic and manual operation modes, catering to different preferences. Automatic players initiate playback with a button press, cueing the tone arm and lowering it onto the record. Manual turntables require you to manually position the tone arm and start/stop playback.
Manual operation provides greater control and is favored by audiophiles. The cueing lever allows precise placement of the stylus. Automatic modes offer convenience, but may lack the finesse of manual control. Understanding your model’s capabilities is key; some allow switching between modes, offering versatility for various listening experiences;
Maintenance and Troubleshooting
Regular maintenance, like stylus replacement and cleaning, ensures optimal performance. Troubleshooting guides within the manual address common issues for a seamless experience.
Replacing the Stylus (Needle)
Maintaining optimal sound quality relies heavily on a functional stylus. The Audio-Technica manual emphasizes replacing the stylus after approximately 400 hours of use. This prevents damage to your valuable vinyl records and ensures consistent audio fidelity. Always use genuine Audio-Technica replacement styli to guarantee compatibility and preserve the original performance characteristics of your turntable.
The manual provides detailed instructions, often with diagrams, illustrating the stylus replacement process; It’s crucial to handle the new stylus carefully, avoiding touching the delicate needle tip. Incorrect installation can lead to poor tracking and potential record wear. Refer to your specific model’s manual for precise guidance, as procedures may vary slightly.
Stylus Replacement Frequency
Audio-Technica recommends replacing your turntable’s stylus approximately every 400 hours of playback. However, this is an estimate, and actual lifespan depends on usage and record cleanliness. Factors like playing dusty records or applying excessive tracking force can accelerate wear. Regularly inspecting the stylus under magnification can reveal signs of damage or dullness.
Ignoring stylus wear can cause significant damage to your vinyl records. A worn stylus will drag across the grooves, causing irreversible scratches and degrading sound quality. Proactive replacement, using only genuine Audio-Technica parts, is a cost-effective way to protect your record collection and maintain optimal listening enjoyment. Consult your manual for specific guidance related to your model.
Cleaning Your Record Player
Regular cleaning is crucial for maintaining your Audio-Technica record player’s performance and longevity. Begin by disconnecting the power. Use a soft, dry cloth to gently wipe down the platter, base, and tone arm. Avoid harsh chemicals or abrasive cleaners, as these can damage the finish.
For the stylus, employ a dedicated stylus brush, brushing gently from back to front, never side to side. Dust buildup on the stylus significantly impacts sound quality. Periodically clean the platter mat with a damp cloth. Keeping your record player clean prevents dust accumulation, ensuring optimal tracking and preserving the life of both your records and the turntable itself.
Troubleshooting Common Issues
If your turntable isn’t powering on, first check the power connection and ensure the power switch is fully engaged. No sound? Verify speaker connections and the phono/line switch setting – it must match your amplifier’s input. Distorted sound can stem from a dirty stylus or incorrect tracking force; clean the stylus and readjust the counterweight.
USB connectivity problems? Ensure the correct drivers are installed on your computer. Humming? Proper grounding is essential; confirm the ground wire is securely connected. If issues persist, consult the Audio-Technica website for detailed FAQs or contact their support team for assistance.
Advanced Features & Settings
Explore the phono/line switch, USB recording capabilities, and audio format compatibility options within your Audio-Technica record player for enhanced functionality.
Understanding Phono/Line Switch
The phono/line switch on your Audio-Technica record player is crucial for optimal audio output depending on your connection. When connecting to a receiver or amplifier with a dedicated “phono” input, set the switch to “phono.” This setting applies the necessary RIAA equalization to correct the sound signature of vinyl records.
However, if you’re connecting to a standard line-level input (like an AUX input) on your receiver, amplifier, or powered speakers, you must set the switch to “line.” Using the “phono” setting with a line-level input will result in distorted and overly boosted sound. Incorrect settings can negatively impact your listening experience, so always verify your connection before adjusting this switch.
Using the USB Recording Function
Audio-Technica turntables with USB connectivity, like the AT-LP120XBT-USB, allow direct recording to your computer. Connect the turntable using the provided USB cable, and your computer should recognize it as an audio input device. You’ll need recording software – Audacity is a popular, free option – to capture the audio.
Within your software, select the turntable as the recording source. Before recording, adjust the input level to prevent clipping (distortion). Record your vinyl, then save the file in your preferred format (WAV, MP3, etc.). This function is ideal for digitizing your record collection, preserving your favorite albums in a digital format for convenient playback.
Audio Format Compatibility (HDMI & Bitstream)
Audio-Technica turntables, when connected to a TV via HDMI, may encounter audio compatibility issues if the TV’s audio output is set to “bitstream” (Dolby Digital, DTS, etc.). Bitstream formats are designed for surround sound and aren’t always compatible with the analog signal from a turntable.
To resolve this, navigate to your TV’s audio settings and change the output format to “PCM” or “Stereo.” This will ensure the turntable’s audio is processed correctly. Experiment with different HDMI cables if problems persist. Understanding these settings is crucial for optimal sound quality and avoiding audio dropouts or distortion when using your turntable with a modern television setup.
Audio-Technica AT-LP120XBT-USB Specifics
The AT-LP120XBT-USB manual is easily downloadable from Audio-Technica’s website, detailing its unique Bluetooth connectivity and USB recording capabilities.
AT-LP120XBT-USB Manual Download
Downloading the AT-LP120XBT-USB manual is a straightforward process. Begin by navigating to the official Audio-Technica website (audio-technica.com). From there, locate the “Support” or “Downloads” section, often found in the main navigation menu. Search for your specific model – the AT-LP120XBT-USB – using the search bar or by browsing the turntable category.
Once you’ve found your model page, a dedicated “Downloads” area will present available resources. The manual is typically offered as a PDF file, allowing for easy viewing and saving on your device. You can then either download the file for offline access or view it directly within your web browser. This ensures you always have access to detailed instructions and troubleshooting guidance for your turntable.
Unique Features of the AT-LP120XBT-USB
The AT-LP120XBT-USB distinguishes itself with several key features. Notably, its built-in USB connectivity allows for direct digital recording to your computer, utilizing software like Audacity for easy digitization of your vinyl collection. Beyond USB, it boasts both Bluetooth wireless streaming for convenient playback to compatible speakers and a traditional wired connection option.
This model also offers adjustable tracking force and anti-skate control, crucial for optimal sound quality and stylus longevity. Furthermore, it supports multiple playback speeds (33/45/78 RPM) and includes a selectable phono/line switch, enhancing compatibility with various audio systems. These features combine to make the AT-LP120XBT-USB a versatile and feature-rich turntable.
Resources and Support
Audio-Technica’s official website offers comprehensive support, including manual downloads and a frequently asked questions section to address common user inquiries.
Audio-Technica Official Website
Audio-Technica’s official website (audio-technica.com) serves as the primary hub for all product-related resources. Navigating to your specific record player’s product page allows direct access to downloadable manuals in PDF format, eliminating the need for physical copies.
The website also features a robust support section, offering troubleshooting guides, FAQs, and contact information for direct assistance from Audio-Technica’s customer service team. You can easily locate manuals by searching for your model number within the support area. Furthermore, the site provides information on accessories, warranty details, and software downloads relevant to your turntable, ensuring a comprehensive ownership experience.
Frequently Asked Questions (FAQ)
Common questions often revolve around USB connectivity for recording to computers, utilizing software like Audacity. Users frequently inquire about proper grounding techniques to eliminate hum, and understanding the Phono/Line switch for optimal audio output.
Another frequent concern is stylus replacement – how often, and which replacement stylus is compatible. Troubleshooting playback issues, such as no sound or distorted audio, also generates many questions. Finally, understanding automatic versus manual operation modes, and adjusting tracking force and anti-skate settings, are common areas where users seek clarification through FAQs and support resources.